|
|
 |
 |
AUSCHWITZ:
Technique
and Operation
of
the Gas Chambers © | |
|
| |
 |
Back |
 |
Contents |
Page 237 |
|
Home
Page |
Forward |
 |
| |
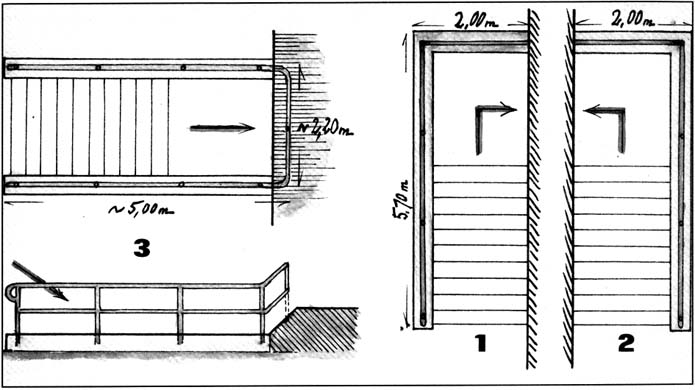
Figures 1, 2 and 3
[Drawings by the author] |
 |
|
| |
Figure 1 shows the access
stairway to the basement vestibule of Krematorium II, leading down
from the north yard. The banister rail is in the the form of an
inverted "L".
Figure 2 shows the corresponding access
stairway to the basement vestibule of Krematorium III, leading down
from the south yard. The banister rail is in the form of an "L"
(hence the need for two different sketches for the two 7.70 m
rails ).
Figure 3 shows the plan and oblique views of
the guardrail for the access stairway to the undressing rooms of
Krematorien II and III. The rail is of a "U" shape and therefore
identical for the two Krematorien (the original sketch 3 was
probably an oblique view). |
|
|
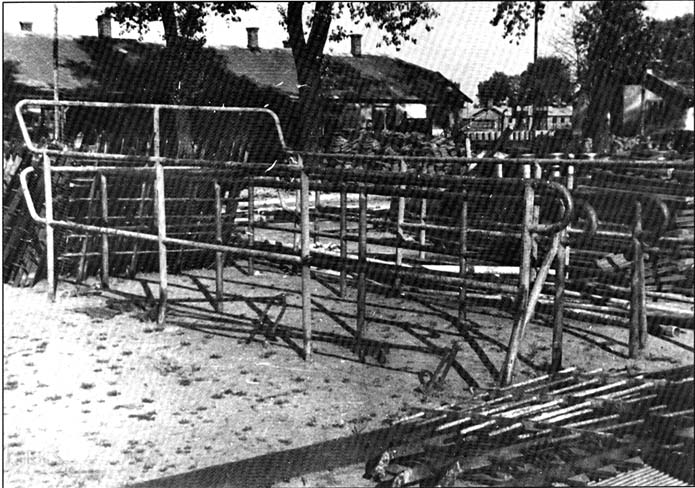
Document 59
[PMO neg. no
897 (Luczko series)] |
 |
|
| |
Metal guard rails from the
access stairways to the basements of Krematorien II and III stocked
in the “Bauhof” and found after the Liberation. A guardrail for the
access stairway to the undressing room of Krematorium II or III is
perfectly recognizable, but in the center of the photo the rails are
so piled up as to be unidentifiable. |
| |
| |
AUSCHWITZ:
Technique
and operation
of the gas chambers
Jean-Claude Pressac
© 1989, The
Beate Klarsfeld Foundation |
|
Back |
Page 237 |
Forward |
|
|